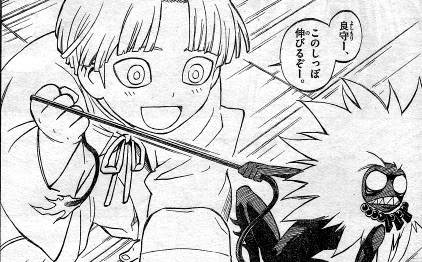
This is a cleaning tutorial from a friend of mine about how to clean in MQ. Its short, so you won't get your eyes tired

and it also explains very well the basics about cleaning.
Here it is:I will write this in the simplest terms possible because I want to

first we start with leveling ALWAYS LEVEL IN GRAYSCALE the trick behind leveling is simple it's the curves it self, when leveling you'll notice a reverse bell curve or something similar the peak on the left represents black and the peak on the right represents white your sliders should be exactly under those two peaks no matter what, the picture above is what exactly it should look like

here's an example of what it should look like once you finished your first level it'll be a little bit dusty but don't worry

Okay here's where we start denoising I myself only uses topaz so it may be slightly different than what you have.....each slider does something totally different Suppress noise is sorta like a master control too much and it's to blurry and to little and it looks jagged, my recommendation is that you lean towards over denoising it SLIGHTLY until you gain in some skill, next is clean I like to turn this way up it smudges the grays so when you level it again the dust disappears, leave the recover details alone, and the sharpen line requires a very delicate touch you want to turn it up enough so the line looks smooth but not enough to make the lines jagged if the area surrounding it is a bit sharp don't worry a level will make that go away

here's what a denoise should look like, notice the smudged grays and smooth lines

basically the same rules apply from the first leveling just be careful you don't over do it

here's what a second leveling should look like

Now we are doing the final edit for this ZOOM IN!! It'll help greatly
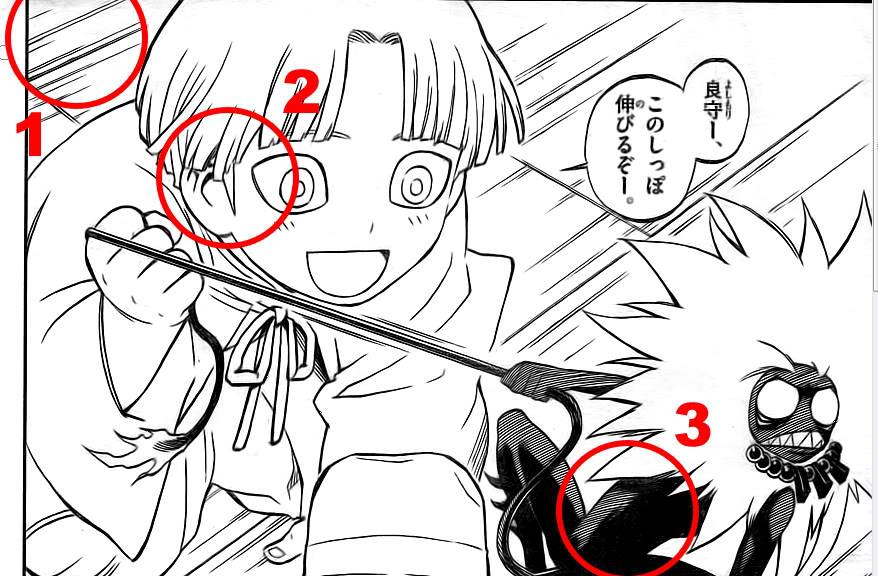
in the image above I've numbered a few problems the page has
1. there are smudged grays in the upper corner where white should be this can be remedied by the dodge tool set at highlights on 10% it's important it's on only this, so once you have the dodge tool set accordingly run it over the spot a couple times and it should disappear
2. You may notice some blurred lines that came from denoising this again can be cured with the dodge tool set on the same settings as before, just run it over the lines a couple times and it should sharpen nicely (a willow trade secret I might add) just be careful that you don't touch the grays or it will screw the grays up
3.There is some dust in the blacks use the burn tool set to shadows at 32% and carefully it over the black areas and were done

There that's what the finished product should look like (if you think it's a little blurry it's because I resized it)


 Now follow us on


